Monday, December 19, 2011

Puppy Love


As much as I don't understand the desire to have a dog in the house to chew up designer shoes and shed fur all over, I can appreciate the love that a puppy brings to the world.  I'm pretty sure that unless my health dictated it, I would never choose to get one because I have enough to feed and clean up after in my world and I don't like having extra responsibilities.  Why do I have children if I don't want responsibility, you ask?  Well, they eventually grow up, leave the house and then take care of me.  My oldest daughter can't get enough of dogs.  She loves them.  I don't get it.  I hope she brings home grand babies some day instead of grand-puppies.

My dearest friend lost her best canine buddy a few months ago.  She was very sad at the loss of this little Yorkie who had seen my friend through the most difficult years of her life.  She has mourned the loss of her little friend and I'm sure that never a day goes by when she doesn't remember the love that little Kalie gave her.  She said to me recently that dogs are very therapeutic for her, and I believe her.  She is a dog person through and through.

That said, my dear friend has a new arrival, and my daughters and I got to go to our first ever doggie shower to welcome Lulu Cupcake, one of the cutest little German Yorkies I've ever seen.  I got to make the cupcakes for the party (as seen above).

I wanted to make her something extra special, so I did some reasearch and came up with a recipe for doggie biscuits.  Ever wonder what do do with the 10 pounds of leftover turkey from Thanksgiving dinner?  Well, I've got an idea for you.


Turkey Bacon Treats
2 c flour (whole wheat or white)
3 c oatmeal (blended into a coarse flour)
1 tps. baking powder
1 egg
1 c. chicken broth
1 tsp. flax seed oil or fish oil (or olive oil, if you don't have this on hand)
2 c. finely shredded cooked turkey or chicken  (I used a food processor to chop mine up into small bits.)
1/4 c. bacon bits
1/4 tsp. garlic powder (opt. to keep the fleas away)

Flour surface and roll out dough into about 1/4" thick sheet. Cut out desired shapes and place on cookie sheet.  They don't puff much in the oven, so they can be fairly close to each other.  Bake on an ungreased cookie sheet at 350F for 30 minutes until golden, turning after about 20 minutes.  After 30 minutes or so, take out of the oven and brush each treat with a mixture of 1 egg white and 3 tbsp. water.  Return to oven for 3 minutes.  Turn and brush the other side and bake for another 3 minutes.  Cool completely before serving and refrigerate or freeze to maintain freshness.


And there you have it, for all my dog loving friends and family (whom I don't understand).  Love you, Lulu!

for Kalie, Shiloh and Cadi.

Tuesday, December 13, 2011

going around and around and around and...

The Roundabout.  In my humble opinion, it's a stupid invention.  And it's not because of the reason Wikipedia suggests: that I'm not familiar with how they work and I'm not used to them.  I'm a pretty smart girl.  I get the rules of the road.  I learn pretty fast what a road sign says.  I still think it's a stupid invention.

I had my first experience with it several years ago in while my husband and I toured southern France with my parents.  The vacation was lovely, but the roundabouts were everywhere and my husband, the designated driver, took them at warp speeds.  We couldn't read the signs fast enough, so we'd go around and around and around and around.  I remember one specific time, there were 4 exits and on every sign, 4 towns were listed.  It was night time and 4 of us were trying to scroll through French town names while getting dizzy speeding by.  I don't know how many times we went around that stupid roundabout, but it was no less than 6 by the time we actually found the right exit.  By the time we found it, we were all laughing so hard that we had tears in our eyes.  It was reminiscent of a Lampoon's vacation.

I've heard nightmare stories about drivers getting stuck in "traffic circles" during Boston's rush hour traffic. I realize that these circles have different rules than roundabouts, but, they're all just as annoying to me.  For all these years, I've been thankful that I live in the midwest, where common sense in road construction prevails...until recently.

 <insert doomsday soundclip here>

For some reason, Minnesota has decided with urban sprawl or suburban decline or whatever the current trend is right now, that it wants to start adding in roundabouts at random spots in the Twin Cities.  I first noticed it in Edina near the upity mall.  "Typical!" I thought.  "Of all places, in the Midwest, Edina would want to give off a European pretense."  The weird part about these particular roundaobuts is that they were randomly installed in an otherwise thru road that had no exits besides a minor turn off for the back entrance to the mall.  In my opinion, they were simply installed to slow traffic down on a road that isn't particularly pedestrian heavy.  Dumb.

I was really not all that disgusted because I don't really shop down there too much.  I just thought it was worth a giant eye roll and a big pathetic sigh.

However, I've now read in my local city's quarterly report that they're putting one in near me (thankfully not on a road I have to readily travel), and now I'm annoyed.  It's at a major road intersection and it's going to be a major pain.  To top it off the article is talking up how great they are for traffic and pedestrian safety.  Yeah,  yeah, blah blah blah.  It's funny, because I don't know a lot of people who generally walk across highways in the middle of nowhere.  Check the safety reports for cyclists, shall we?  They tend to get hit a lot more in roundabouts than a typical intersection.

There's my soapbox sermon for the day.  Roundabouts are stupid.

Monday, December 5, 2011

dressing up my fireplace

Last year, I added a mantle to one side of my 3-sided fireplace.  It was a blank canvas of brick and I was tired of not having anywhere to hang my stockings.  It's pretty basic, just a 2x8 and a couple of brackets from Anthropologie.  The entire project cost me about $80 ($50 for the brackets, $10 for the wood, $20 for the paint).  Not bad for a new fireplace mantle, but I was ticked off that I had to buy new brackets.  When we moved from our old place, I brought with me some nearly identical brackets I had purchased 10 years ago for half the price.  I searched high and low and could not find the box that had yet to be unpacked, and I was annoyed that I had to buy more...and that the price had doubled.

Oh, wait.  I lied.  I also spent $80 on a hammer drill that we had to buy to get the screws into the brick to hold the brackets to the wall.  My husband went through about 5 drill bits and 45 minutes he'll never get back to try to drill pilot holes into the brick and only got about 1/4" deep into one hole before he gave up and bought a hammer drill.  Then it took him all of 10 minutes.

Well, a year and a storage room cleaning later, I finally found the box and the brackets, and so I've decided to add a mantle to the other side of my fireplace...facing the "sitting room" that is used for the office and temporary home of my industrial sewing machine.

Here's my quick and relatively ambiguous "how-to."

Make sure you check the safety regulations for mantles.  There are specific codes for how deep and how far above the fireplace a mantle should be.  I used this reference guide on which there is a simple diagram on page 195.

Step one: Purchase brackets...pretty ones.

Step two: Measure desired length of finished mantle and depth of brackets.

Step three: Pick out wood.  Use planed for a crisper, more modern look or do what we did and use basic lumber.  Please make sure the wood you choose is not warped in any way. Cut it to the right size or have the lumber store cut it for you.

Step four: Prep and paint the wood panel.  I sanded and filled any holes and knots with wood filler.  I used oil based primer and then semigloss latex paint.

Step five: Measure and place the brackets so they are level and evenly spaced from the edges of board and walls.  Use a laser level to make sure your brackets are set so that the mantle will be level.  Be sure to level vertically too.

Step six: Mark where your screw holes will go with a pencil and use a hammer drill to make pilot holes.  Attach your brackets with masonry screws.  If your wall is drywall instead of brick or stone, you can use a regular drill and drywall anchors if needed.

Step seven: If your brackets have little knobs on them to hold your wood in place like mine did, mark where they go and drill small holes to house the knobs. Make sure the space between the board and the wall is even on both sides.


Step eight: put board in place.

Step nine: paint the screws so they blend in.

Sunday, November 27, 2011

Name Bubbles - one of my favorite products ever!

As a disclaimer, I'm not getting a kickback for writing this.  I just had to share how much I love this product and company.  And with Christmas coming up, it's something to think about.
A few years ago I came across a blog review of a new product called Name Bubbles.  I was intrigued.  Stickers that stay on in the laundry, microwave and dishwasher?  The review was glowing, but I still wasn't convinced.  "IF they stay on," I thought, "they must be made of something so heavy duty that it would irritate your skin like a cheap tag pokes at you all day."  How wrong I was!  These labels are everything they promise to be.


My oldest daughter has some skin issues and since she was a tiny thing, she has complained about itchy tags in her clothes.  Some I would just cut out of her clothes. Since I wanted to save some of her nicer things for either selling later or handing down to her sister without wondering what size they were, I didn't want to cut all the tags out. Many of them had bandaids covering them.  Some bandaids stayed on for a long time, some created a sticky mess.


So to make a short story long, I emailed the new company and asked if these award winning Name Bubbles would irritate my daughter's sensitive skin, figuring, if they said, "no" I'd try them out.  Instead of assuring me that they would not bug my daughter, the owner asked if she could send me a sample to try out...for both of my daughters!  I was stunned and excited to try them out.  A few weeks later, I got 4 packs of adorable tiny little stickers with my girls' names on them.  I was impressed just by looking at them, but the real test was whether they really do stay on in the laundry or dishwasher and whether my daughter would squirm and whine about them against her neck.  They were more thin than a bandaid and they were flexible.   I immediately stuck one on her shirt.  She didn't complain.  I stuck them on everything: clothes, bottles, shoes, coats, anything that left my house regularly.


They stayed on in the laundry and the dishwasher and didn't make a sticky mess.  2 years later, the labels are still attached and have gone through 2 kids and favorite t-shirts.  I've told many friends about the company and the product and many have purchased this amazing product.  I am thrilled to see that Name Bubbles, designed by then new mom, Michelle, is growing and succeeding.  What's not to love about this company?  A mom sees a problem, solves it and then offers the solution to other moms with the same problem.  Clearly put your kids' names on their stuff - you can read it and it won't wash off.  Brilliant!


So, here's my plug for Name Bubbles:  BUY THESE!!!  There are many value packs to choose from, many styles, sizes and color themes.  My personal favorite are the Bitty Bubbles and Bubble Tags, mostly because they're what I've used most.  They're tiny little labels that fit on anything.  They also have medical alert labels, allergy alert labels, contact info. labels, labels for shoes, oversized labels, tiny labels and they're dishwasher and laundry safe!  Their laminated laundry labels can withstand bugspray, sunscreen and the heaviest of detergents.  Really, how can you NOT be impressed?


In addition to various size options, there are icons and shapes to choose from too.  There are juvenile styles for young kids and monogrammed or classic styles for older kids and adults with fun color options for everyone...and they can be used on everything. 

So, in thinking about the holidays, these are great stocking stuffers for any kid from newborn to college.  They're great for adults too, I kind of wish I had some with my name too, since I'm prone to leaving my things all over town.  There is a great sampler pack that includes six pages of personalized stickers that you can order up to 6 different names.  This pack is only $19.88 and is great for stocking stuffers for multiple children or party favors or if you have several kids and only a few things to label.  I love how they offer this product for almost every budget.


Here's a section from their last press release, and it still doesn't adequately describe how much easier your life will be with these labels!  
Name Bubbles' School Labels and Preschool Labels come in a variety of sizes and styles that are waterproof, dishwasher, laundry, and microwave safe.
"My son enters Kindergarten this fall and I believe I may be more nervous than he is. I’ve already started labeling his lunchbox, clothing and school supplies, so I’ll have one less thing to worry about as the big day approaches," said Michelle Brandriss, CEO and founder of Name Bubbles. "This will be the first time my son will be solely responsible for carrying his own backpack and keeping tracking of his personal items. The amount of supplies that he is required to bring at such an early age was surprising, and I want to avoid digging through the lost-and-found box."
Name Bubbles School Pack is a perfect mix of labels for school and afternoon activities. The label pack has an easy press-and-stick application with many designs and colors to choose from. With 88 personalized labels for $33.88, your child will be using their bubbles in many practical ways, including:
*  8 Square Bubbles - perfect for big ticket items, such as an iPod or gaming system, that might need a phone number and e-mail to be returned
*  16 Fun Bubbles - great for water bottles, bento boxes, and pencil cases
*  18 Mini Bubbles - skinny waterproof labels for pencils and pens, staplers and tape dispensers
*  2 Super Bubbles - extra large labels for sports and after-school gear
*  28 Bitty Bubble OR 25 Bubble Itz (laundry labels differ by style chosen) press-and-stick kids clothing labels, the perfect solution for quick and easy labeling that stays put
*  16 Pairs of Bubbles Toes - our popular shoe labels that are laminated for extra durability but can be used on any personal item heading out the door.
Created for busy families - by a busy mom.
Prior to founding Name Bubbles, Brandriss home-tested name labels from several companies, but she quickly became frustrated with their limited options for styles, colors, and personalization. There were so few colors and designs available that mix ups still occurred and she also learned the extent of her son’s food allergies. Wanting a label that provided both medical instructions and contact information, Brandriss took the reins and designed her first series of Name Bubbles at a local coffee shop in Upstate New York. Since then, the company has grown into a print facility and offers an entire line of personalized waterproof labels to families all over the world.

About Name Bubbles
Winner of the prestigious iParenting Award for Outstanding Products, Name Bubbles are fun and functional waterproof press-and-stick name labels designed to help busy families keep track of school supplies, toys, clothing, hand-held electronics, baby bottles, school uniforms, sports equipment, and much more. Name Bubbles waterproof labels are safe for the dishwasher, laundry, and microwave. Custom label packs are available for school labels, daycare labels, camp labels and clothing labels. They can all be personalized and purchased right on the Name Bubbles Web site at www.NameBubbles.com.
So, there you have it.  A great gift, a great product, a great company.  I can't reiterate enough.  BEST PRODUCT EVER.  Really. Get them.  Go buy these NOW.  Have I stated this clearly enough yet?  Am I starting to annoy you?  GOOD.  Then do something about it.

Thursday, November 17, 2011

Sweet Baby Girl

A friend of mine is having a baby girl.  This wouldn't be unusual or overly exciting for most, but this particular friend has 3 boys already.  We were all shocked and thrilled for her when she told us she was expecting a girl this time around.  She's a wonderful mom and I've always thought that good parents should have lots of kids.   My sweet friend, Tiffany thought it would be fun to shower her with girl clothes and accessories (since her house is full of all things boy), so she recruited a couple of us to help throw her a shower.  Our friend, Meredith, is a wedding planner and what better person to help with a party than a party planner, right?  She was amazing.  I can't take much credit for this party other than the cupcakes (shocking, right?) and it happened to be at my house.  I can't really even take much credit for my house being clean, since my mother did much of it the night before when she was babysitting for my girls.  (I have the BEST mom ever - don't even try to argue that one, you'll lose.)

So, in addition to the beautiful decorations and candy buffet that was set up on my dining room table, there was a lovely fruit display that was made to look like a baby buggy (thanks to Renee).  The main cupcake request was carrot cake, which honestly, I can hardly say aloud without gagging a little, but my friend over at MommaCakes gave me her fail-safe recipe and I hear they tasted good (to those strange people who eat veggies in their cake).  I also made devil's food and butter cupcakes, for the rest of us.
Carrot with Cream Cheese frosting

Butter with Classic Vanilla Buttercream

Devils Food with Buttercream
(and, to toot my own horn, those little hot chocolate cups on top were my favorite!)

The punch was a hit too, though again, I can't claim credit for it.  We did a chocolate coffee punch and a strawberries and cream punch that were both amazing.  I think the recipes were found online somewhere, but here they are!

Pink Strawberry Punch
1/2 gallon vanilla ice cream
1 2-liter Strawberry soda
1 qt. fresh strawberries, coarsely mashed

Allow ice cream to soften and add 2/3 of it to a punch bowl.  Add strawberries and strawberry soda and stir.  Add more ice cream to the top.

Chocolate Coffee Punch
8 tbsp. instant coffee
3 qts. hot water
1 tbsp. vanilla
2 c. sugar
2 qts. milk
1 small can chocolate syrup
1/2 gallon vanilla ice cream

Heat water.  Add coffee and sugar and stir until dissolved.  Let cool.  Add milk, vanilla and chocolate. Refrigerate overnight if possible. 30 minutes before serving, scoop ice cream into punch bowl and add coffee mixture.  Makes 40 servings.


Happy Baby Girl, Heidi!

Monday, November 14, 2011

Midnight Snacks

I've been wanting to try these for a LONG time, but haven't had the energy for it until this week.  You'd think I'd find a different weekend than the one I have to make 6 dozen cupcakes for different events and people, but no, no.  I'm crazy like that.

And let's face it, I secretly also want everyone to think I'm a super star and a little superhuman.  Don't pretend you wouldn't wish it.

I call these little cakes Midnight Snacks.  They have everything you need for a late night snack:  dark chocolate, vanilla ice cream, potato chips and soda - or pop for the mid-westerners (I'm so with you guys) or Coke for the southerners (ya'll are a little weird).  Salty, sweet and plenty of chocolate!


These are divinely dark chocolate cupcakes filled with sweet vanilla cream (my take on ice cream), with chocolate cola flavored buttercream and topped off with chocolate covered kettle potato chips.  What could be better?


(And don't worry, you southern folks, when I lived there, for a season of life, I called all pop Coke too.  I remember the first time I asked for a Coke at a restaurant and the server asked me "what kind?"  It took me a while to get it, but I eventually learned to fit in.  People make fun of us mid-westerners for calling everything "pop" too.)

Friday, November 4, 2011

dabbling in card making

I love bartering...for many reasons.  I love that I can share in someone else's expertise for something they can offer.  I have exchanged voice lessons for babysitting, cakes for photos, and a variety of other trades.  One I'm looking forward to is having our favorite nurse practitioner at our pediatrician office knit me a felted purse if I do the finishing work for one for her.  When you barter, you get things at cost, you get them more personalized and you know what to expect because you usually know someone's work already.

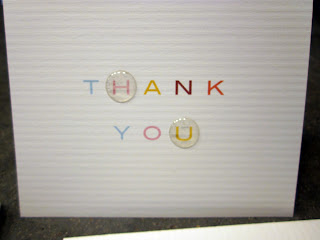
My latest exchange is with my favorite photographer,Olive Avenue Photography.  I designed and made thank you cards for her business and she is going to design my Christmas photo cards...if I ever pick my photos for her.  I used to make cards all the time, and I sometimes make them for something special, but I don't do it much any more for one reason or another.  When I'm commissioned to do something creative, I'm always up for the challenge.

Jess wanted something simple and classy, but also fun.  Here is what I came up with and I think she likes them!


 The envelope has one single heart front center.  Some with bubble dots, some without for mailing.

Anyone else want to barter?  If you'd like a list of my services available, let me know.  They are vast, because, as we all know, I'm so very wonderful and you know you wish you were me.  <insert laugh track here>

Monday, October 31, 2011

Spiders, Witches and Eyes, oh my!

I was so excited to be able to make cupcakes for my daughter's kindergarten Halloween party this year.  It was a great party and well organized.  The parents and teacher did a great job and the kids had tons of fun.  I admire kindergarten teachers on a tall pedestal level.  They have to wear dozens of hats from lovable and creative, to authoritative and organized - and everything in between.  I can't imagine what it takes to do this job, but I know I don't have the skills.  My daughter's teacher is amazing and we love her.  Every interaction I have with her makes me more thankful she is part of my daughter's life.

Ok, enough sappy gushing, let's talk about ME!  Here are the cupcakes I made for the occasion.  It was fun watching the kids' reactions.  "Oh, gross!  You're eating an eyeball?!"  I forgot that most kids don't care about the cake, they just want the frosting, so most of them ate the icing off and put the rest in a ziplock to take home.  The kids loved them, so that's all that matters, right?

EYEBALLS!
(chocolate cakes with red raspberry cream filling and purple buttercream)


WITCHES!
(Pistachio cupcakes with pistachio cream filling and electric green buttercream)


SPIDERS
(Chocolate cupcakes with electric green buttercream)


Sunday, October 30, 2011

reclaiming my chair

I have a strange problem that when I think of a project I want to do, I need to do it now - not tomorrow morning, not later today, but now.  Last night after dinner I decided I was tired of looking at my dirty, faded and marker/pen colored chair, so it was time to recover it.  Because I needed to do it now, I had to use fabric from my stash.  I found some leopard print decorator fabric that I once bought to make a table cloth.  Since the table cloth never came to be...

I bought a chair at a thrift store about 10 years ago.  It's a very basic chrome kitchen chair, but I loved it.  It was gross and dirty and had nasty orange plaid vinyl on it.  I recovered it with red vinyl and used it in my kitchen for a few years, then recovered it again with a purple cabana striped canvas and used it in my office.

The sun and my daughters have since destroyed the stripes and so I spent about an hour recovering it.  My husband thought I was crazy, as always, but I came away with a pretty cute little chair and when I get sick of looking at it like this, I'll change it again later.

Before
 Notice the lovely artwork from my youngest daughter

Step 1:  Remove the seats and back from the frame.

Step 2: Remove old fabric.  This is a step process since my chair has the back tacked on, I had to take those off first.
 With a flathead screwdriver and needle nose pliers, remove staples.
 Pay attention to how the fabric is pleated, so you can put the new fabric on in a similar way.

Step 3:  Using old cover as a pattern, cut roughly the same dimensions and shape for the new fabric.
I'm sure the chair had been this dirty for a LONG time, but I refused to notice it until the marker showed up.

Step 4: Pull fabric around the seat (and back) evenly and tack in place with an electric staple gun (or a manual one will work if you're strong enough...which I am not).  Tack one side, then the opposite, then the adjacent sides.  Pull fabric around each corner to make small pleats (as in the "before" picture above), and tack in place.  Make sure the top is smoothly covered and taut.  Repeat with remaining seat back pieces.
 You should consider me armed and dangerous with a staple gun.

Step 5: Replace the back with upholstery tacks and reattach the seat and back to the frame.

and VOILA!


Thursday, October 27, 2011

It's alive!

Well, I've been talking about it for two years now and I finally did it!  I opened up my Etsy store, and I'm starting with custom dolls!

View Etsy listing here!

These dolls are 100% Cotton with Acrylic yarn hair.

Each doll come with your choice of 5 skin colors, custom eye and hair color and a dress or nightgown. They can be made to look like your child and will eventually be able to be ordered with a suitcase full of clothes!

They're made to order, so if you want your little girl to have a completely soft snuggly little look-alike of her in time for Christmas, order one now!

Also for sale is the ever-popular Rosie Ballerina bib from my company's old store front, Hattie Rose Designs. Other designs will be for sale soon!

Now you may shower me with congratulatory statements and such for finally doing what I've said I would for 2 solid years.

Friday, October 21, 2011

because I don't have enough hobbies

I recently took a trip to our pediatrician and had the most wonderful conversation about knitting.  Our favorite NP, Nancy told me she would knit me a felted purse if I sewed and finished some of her knitting projects for her.  I was SO excited.  She introduced me to www.NoniPatterns.com and I was even more excited!  She casually said, "I bet you could learn to knit."

Another good friend of mine has a hand-knit Etsy store where she sells some pretty cute stuff.  It's called the Pknit Gallery, which is, of course, the cutest name ever for a knitting boutique (go check it out!).  I figured I would try to teach myself to knit a basic stitch online and then ask my friend for help if I got stuck.  YouTube has some good tutorials, so I went to work learning a new hobby.

I decided that I could at least make a scarf for my youngest daughter.  She picked out the orange yarn, and I went to work.  It turned out just fine, but it was full of mistakes here and there.  You wouldn't know it at a glance, and she certainly doesn't care!  She's just happy to have something orange around her neck.  My older daughter asked for a purple hat.  I picked up a book called Felted Knits from the library and decided to make her a felted hat out of wool.  It couldn't be that hard, right?

I started with the beret.  I started, I re-started and I re-started.  I'd get about 12 rows and it would all be completely off.  I think I gave it a good 7 tries.  In a fit of frustration I finally took it out for the last time and moved on to something a little less annoying...a rimmed hat.  That one went swimmingly.  I had mistakes, of course, but I didn't get off count.  And the best part is that the mistakes didn't matter one bit since the whole thing was felted.  I was completely thrown off by terms like "k2tog" and "ssk" and "wrap & turn" as well as pretty much everything besides "purl" and "knit" so I would google the term for a how-to video or look at the glossary in the back of my books.  Turns out they're not that hard, but for a knitting idiot, it was.

When I finished the knitting part, the hat was so big that it looked like a sack.  When I picked my daughter up from school, I tossed her the hat and snapped this picture with my phone:

Then I went home and hand felted it until it was the right size, and I'm loving how it turned out!
drying on some towels


Now I plan to add some flowers, but I need to get to the store to get more yarn colors.